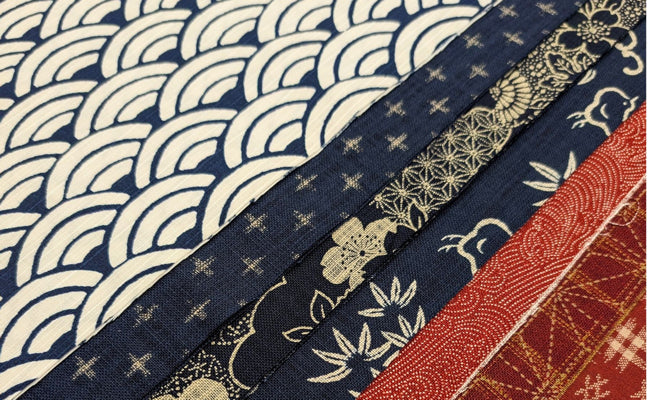

When people ask me where to start with Sashiko, I often suggest one of these fukin (foo-keen) and tell them to pick a design they will actually finish. If you go for the super complex designs on your first try, it’s more likely you’ll get frustrated and shove it in a drawer, never to be seen again.
Keep your hands happy. Make a little Sashiko Fukin (刺し子ふきん) towel, also called a hana-fukin (“flower cloth” 花ふきん) or yume-fukin (“dream cloth” 夢ふきん). I’ve selected a classic design for beginners that I think you’ll enjoy even if you’re an experienced stitcher.
Here’s what I’m working on today: 菊刺し “Chrysanthemum Sashi”, named for the chrysanthemum/fan designs in each corner.
I chose this design as it’s one of the quickest to do in a single afternoon or weekend. The open spaces can also be modified by adding more designs yourself if you want to personalize it! More about that in a future post.
Why do so many old Japanese wrapping cloths have those flower/fans in the corners? It’s because sashiko is meant to strengthen fabric, and those stitches make the corners more resilient to being pulled taught and tied.
These double layered cloths are made from a single layer of lightweight cotton fabric folded in half to make a small towel. The finished cloth is absorbent and quick to dry.
Afraid to actually use it for drying your hands or dishes after you put so much time into making it look good? That’s ok! While these are practical, they can also just be pretty. Frame it, stitch it on to a tote bag or jacket, wrap a loaf of bread for the table, or add it to a quilt.
You can find a wide selection of sashiko samplers here in our Etsy shop. For this specific design in navy blue or white cotton fabric, click here. If it doesn’t appear available, please contact us through our Etsy shop.
Fukin/samplers measure approximately 12″ x 12″ when completed. Here’s an example right out of the package, approximately 13″ x 26″:

Let’s break down the instructions that are printed on the fabric.
The short dotted lines are your stitch lines. The long-and-short lines are folding lines.
All of the markings are printed in a washout ink that will disappear with water, so first off, do not spray, steam, or iron the fabric until you are finished! The next image shows an iron and spray bottle crossed out as a reminder: Keep your fabric dry.

The numbers in the previous image correspond to these instructions:
- Fold fabric in half with printed design (top) facing you, and trim excess fabric along edges to approximately 1/4″ from folding line
- Fold edges in, pin in place
- Baste to secure layers
- Stitch the border on the marked dotted lines
- Stitch pattern as shown
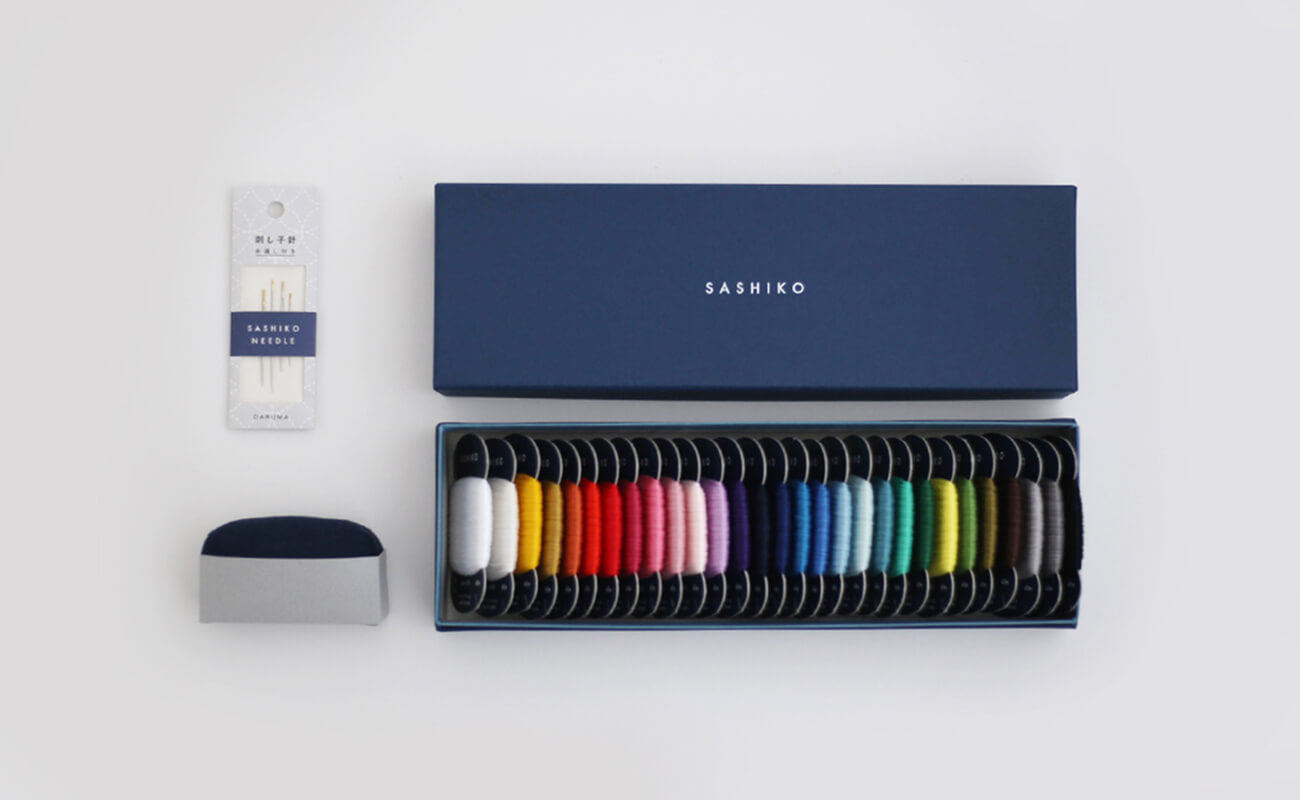
Thread Notes: I prefer to stitch with a long thread, roughly 1 yard (36″) ~ 1 meter (39.5″) long. This length is perfect for stitching the border, as you can go all the way around on one thread. Choose a 4- or 6-ply sashiko thread. We primarily use Daruma, Yokota, and Olympus brands in our shops, available here in our new shop, and here on Etsy.
Sashiko thread is not meant to be split, but it can be doubled for a thicker look. I do not suggest doubling for this project as pulling thick thread through layers of fabric is kind of a nightmare and aggravates any existing carpal tunnel issues.

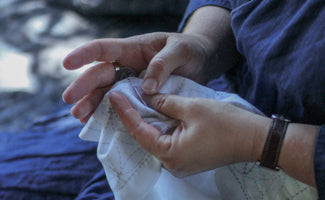
So, how to start stitching? You could tie a basic knot, but since sashiko thread is so thick, I prefer not to use knots unless necessary. The previous image shows an example of backstitch and carry-over stitches. Backstitch is best when you have definite start-and-stop points in a design. Carry-over is great when you’re following a straight line that connects to itself, such as the outline/border, or are playing “thread chicken” (can you make it to the end of the design before running out of thread? Let’s find out!).
When using either technique its best to co-mingle the threads. That helps the fibers lock into each other and keep your ends secure. Allow for a 1cm or 1/4″ tail when you start and stop.

Looking at the previous photo, note the longer tail visible on the right side. That’s where I entered my needle, then moved up about 1cm and started stitching. My 1 meter thread was long enough to finish the entire border and end up where I started, with a little to spare. I kept stitching through 3 of my first stitches, then exited the cloth (it’s very hard to see, just under the word “Exit” on the left side) and trimmed my threads close to the cloth so they’d disappear between the layers.
Note how I show the entry tail on the top of the fabric. This is a personal preference of mine. You can enter your needle from the back, but I like to see where my loose ends are so I can hold them down if I need to pull my thread while stitching. All of my tails are trimmed close to the fabric when I finish and disappear between the layers when I wash the cloth.
When turning corners it helps to leave a bit of ease in case there is too much tension in your stitching, or a thread is pulled tight or snagged while stitching. Note the small loop on the corner in the next photo. These tiny loops usually ease into the rest of your stitches with washing and wear.

Here’s a fun side quest if you’re up for it. See the small versions of the main design on the back? Those exist to show you the progression of stitches, but I sometimes like to stitch them for practice. I do this before folding and sewing the layers together so my design will only show on the back, not on both sides. For this specific design I only did the plum blossom, not the chrysanthemum. I’ll show how it looks at the end of the post.


Note the 10cm (~4″) measurement and stitch progression on the Chrysanthemum/Fan diagram. Start stitching at the curve, then finish at the corner, leaving each thread loose at the end. When the fukin is finished, these 4″ threads are braided together and tied with a knot at the end.

As you go, keep checking on your tension. If your stitches are too tight it will warp the fabric. Loose stitches are better and allow for some give in the fabric.

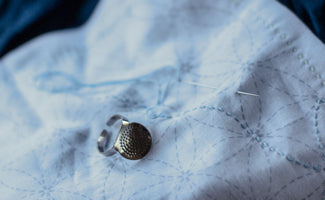
Once you’ve filled out all the marked stitches, it’s time to wash the cloth and remove the markings. All you need is a sink or basin of plain water. Agitate the cloth in the water to dissolve the ink, then smooth it out and hang it to dry. You can press it between layers of a tea towel, but it usually isn’t necessary.
Here’s how the front and back turned out after washing and drying, but before ironing.


These cloths make eco-friendly wraps for small gifts, and become part of the gift themselves.


I always suggest choosing a simple design for your first sashiko experience, so you can enjoy the process and complete a project with less fuss. Save the fancy designs for your next project, once you’ve gained confidence in your technique.
The sampler shown here can be completed in one day. If it takes you a year, so what? It can wait until you’re ready to finish. And if it doesn’t look as good as you’d like once you do finish it, then definitely use it in the kitchen! There’s no reason to toss it into a drawer and forget about it if you could use it instead.
